Client Login is a fabulous way to give your clients greater visibility on their appointments and details while encouraging quick rebooking. There are a few things to consider when setting up Client Login for your business.
This guide will step you through the process of setting up Client Login for Online Bookings. We'll cover how to:
- Making Client Login visible
- Duplicate accounts.
- Booking Buttons.
- Letting your clients know that they can log in (SMS and email templates).
Making Client Login Visible
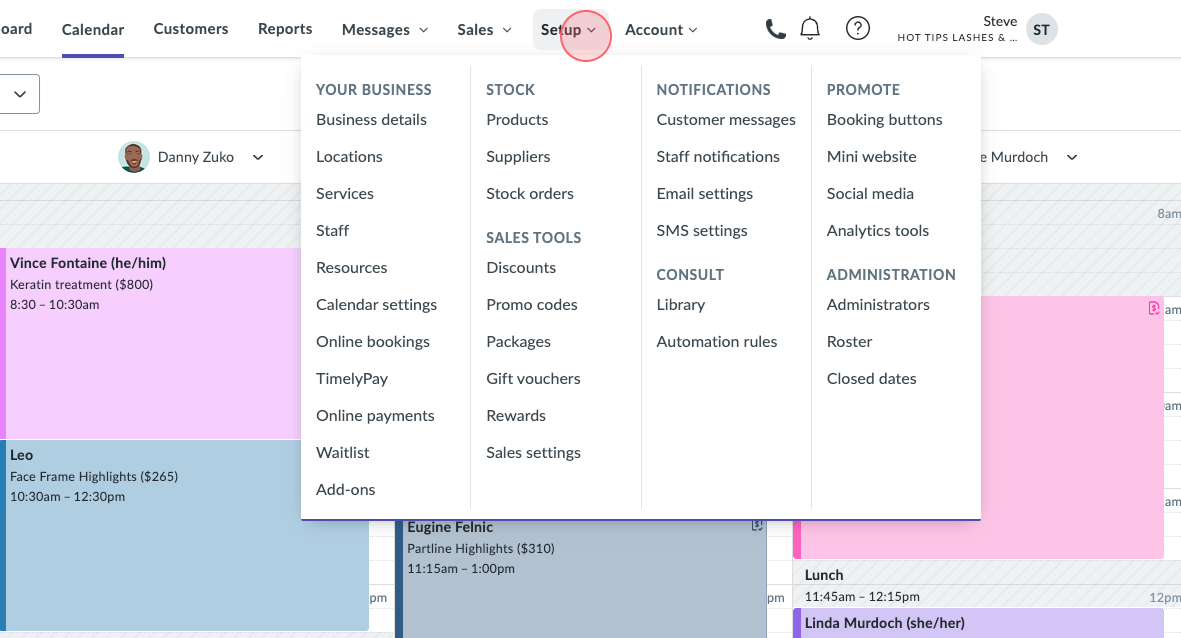
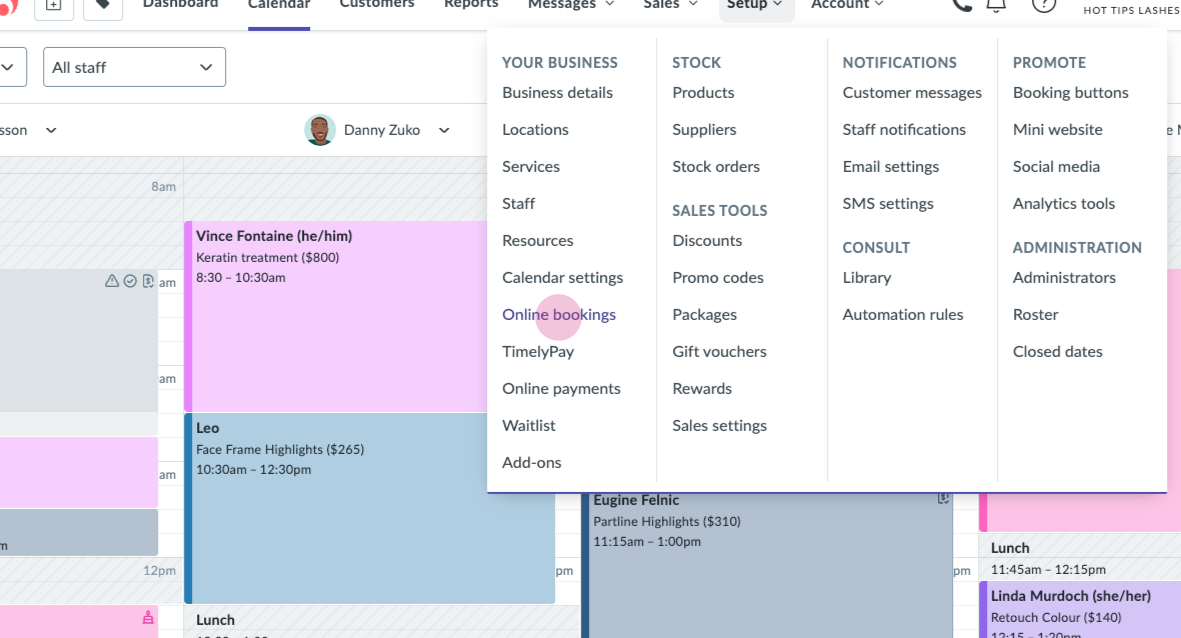
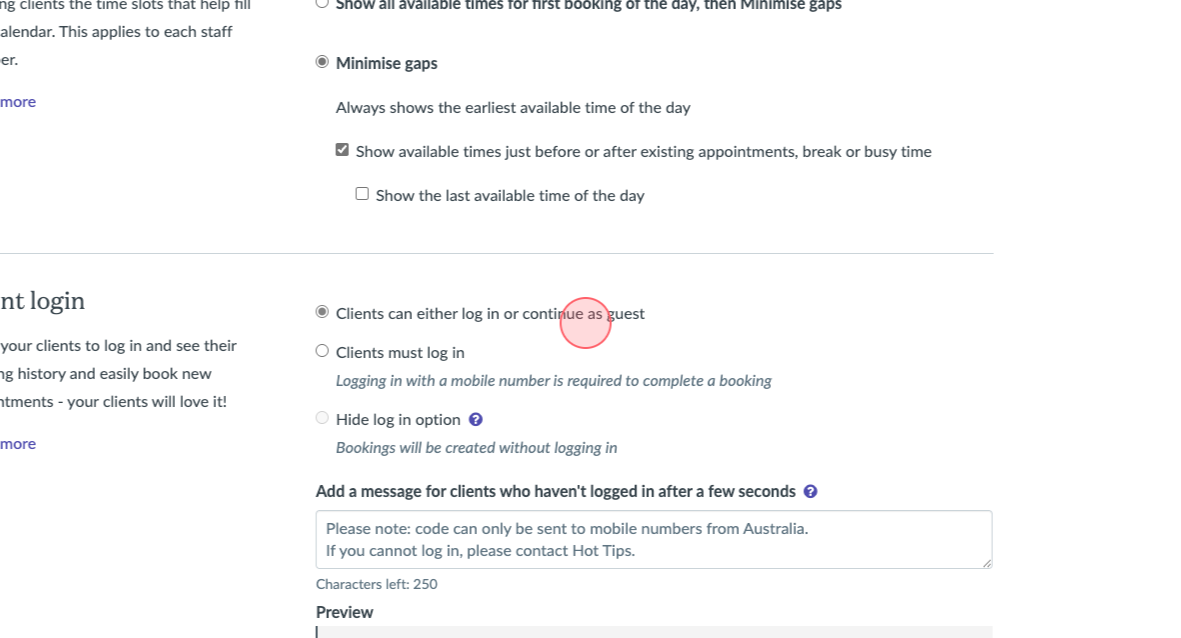
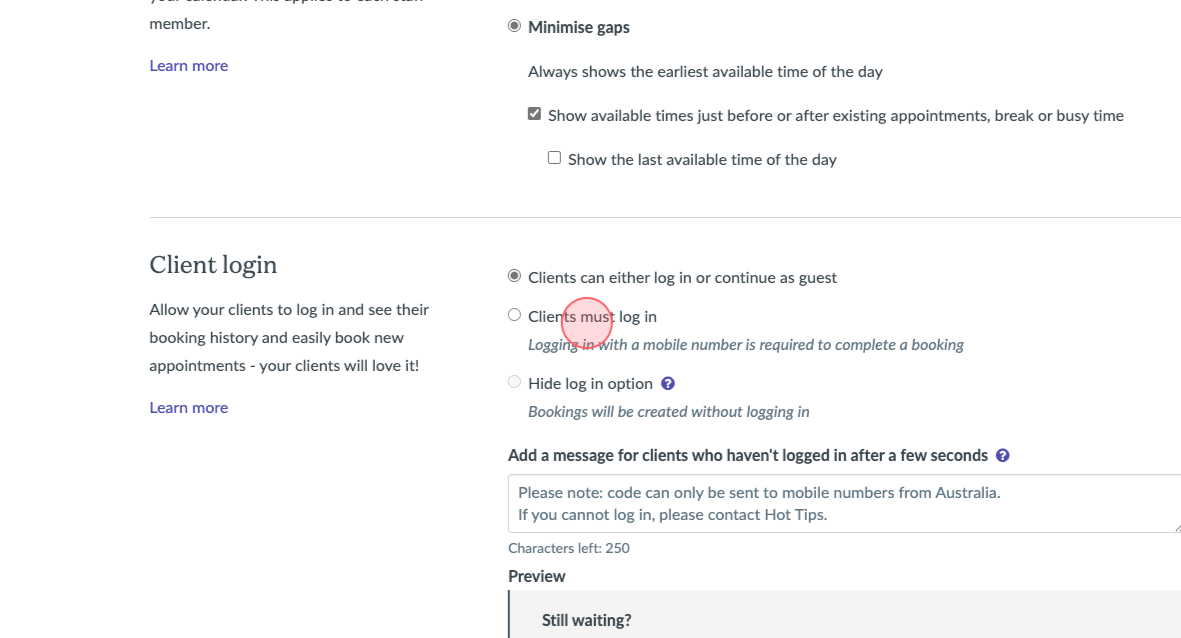
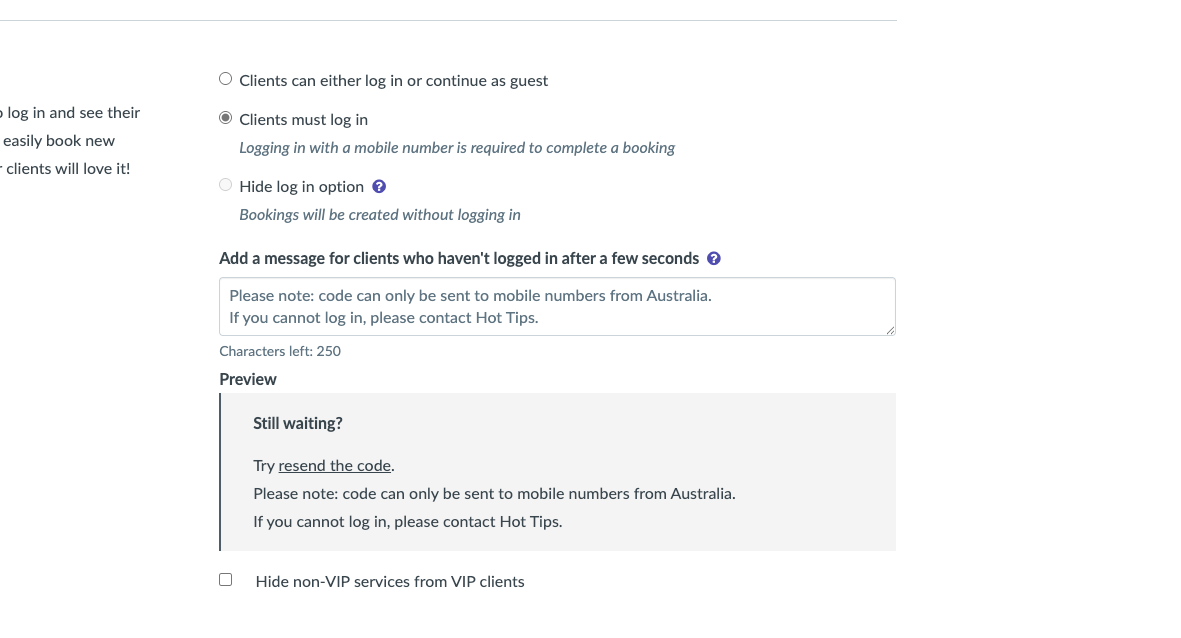
You can add Client Login to your Online Booking flow from the Online Booking section of the Timely Setup. Under the Client Login setting, select Clients can either log in or continue as guest to turn on Client Login and then click 'Save'.
Please note that if your business is using TimelyPay, the setting to Hide log in option will not be available, and an updated version of online bookings will be automatically enabled for you. Learn more about the Updated Online Booking.
If you choose not to have Client Login visible in Online Booking you can still share your Client Login links with your clients to take advantage of the appointments history and client details features. Read more here.
Duplicate accounts
We use your clients' SMS to log them in and connect them to their records. If you have multiple clients with the same SMS number we'll use the details that have the most recent booking made. A quick audit of your duplicate customers is a really good idea before enabling Client Login to make sure you're happy with who sees what. You can check this in the Duplicate Customers report, just filter by SMS number and then use the merge tool to combine any doubles.
Booking Buttons
Once you have enabled Client Login, your clients will be able to log in using the banner that will appear in your Online Booking. However, if you use booking buttons on your website you will need to make sure that you have the most up to date snippet. The snippet tells your booking buttons how to behave, and you need to have the latest version for Client Login to work.
On your Booking Buttons page, in Step 4 you can see that the top line is the snippet. You need to make sure the code on your site says 'book-button-v1.5' in it.
Please let us know if you have any problems updating your snippet.
Letting your clients know that they can log in
With all the cool new features available in Client Login it's a great idea to reach out to your clients to give them a heads up. Below are a sample SMS and email you could send out using an SMS campaign or our Mailchimp integration.
SMS
Copy and paste this: "You can now quickly rebook and check on your upcoming appointments at SALON NAME! Log in using your SMS number to access these new features by visiting BOOKING LINK"
Hi there,
YOUR NAME here from SALON NAME. I wanted to let you know about some great new features we’ve added into our Online Booking service. You can now log into our system using your SMS number. Logging in will access to your full appointment history and upcoming appointments so it’s easy to see what’s coming up. You can update upcoming appointments and there's also a quick rebook feature.
To log in all you need to do is click the pink banner in Online Booking and enter your SMS number. We’ll send you a one time code that will keep you logged in until you sign out again. If you’ve recently changed your SMS number or if you haven’t given it to us before please let us know so we can update your details and give you access to all these new features.
We look forward to seeing you again soon
YOUR NAME